Showing posts with label changed over. Show all posts

Tuesday, February 9, 2016

When God sends you red lights


One morning on my way to work, I was driving down a familiar stretch of highway where all the cross streets had red lights on sensors; they only turned red for the main road when a car was sitting, waiting to cross. Eleven lights stood between me and the interstate, but it was 6:30 in the morning and there wasn't a lick of traffic to be seen.

As I approached the first intersection, the light turned red. I slowed as I should have done, but before I came to a complete stop the light turned green again. Funny. No car had been at the cross street to trigger the sensor. Well, it must have just been a fluke. I paid it no mind and continued on my way. A block down the road I approached the second of the eleven lights. Like magic the light turned red ahead of me, so I began slowing down, but before I could come to a complete stop the light turned green again. Just as the previous light had done. Now that was weird. Again, there hadn't been a car at the cross street to trip the sensor so I was thoroughly confused as to what was going on. Once was coincidence, but twice? Twice was odd.

Each of the next 8 lights did the same thing. They turned red ahead of me as I approached and then promptly returned to green before I had had the opportunity to come to a complete stop. Each cross street sat utterly vacant. I never once had to stop; the lights merely forced me to slow down and add a few seconds to my morning commute. As each new light changed to red and I took my foot off the gas I glanced into the rear view mirror at the trail of green lights behind me reaching as far as I could see. What on earth was going on?
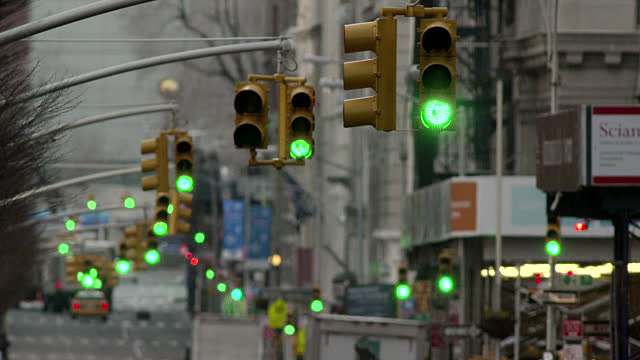

Light number eleven. The last light that stood between me and the interstate was finally in my view... and it was green! I could hardly believe my luck! Finally! In my blind excitement I never saw the flash to my right. It happened so fast that I couldn't even comprehend what had just happened until it was all over. Not three car lengths in front of me a little red car on the cross street had blown through the intersection without even so much as a yield. Their light was red. I knew it was red because mine was still green! If I had been even a few seconds ahead of where I was then that little red car would have clobbered me.

And then it hit me.

How many seconds had each of those previous ten lights slowed me down when they miraculously changed from green to red? One? Two? Maybe. If even that much. However, when added all together those precious seconds had spared me from what could have been a life-changing wreck. Right then and there I stopped to thank the good Lord above for watching over me.

That got me thinking about the red lights in my life. How many times had I grumbled to God over something that hadn't gone my way? A relationship didn't work out. I didn't get that dream job. The car broke down. I hit red light after red light on a morning with no traffic...

Perhaps those hardships and troubles are intentionally placed in our paths by a God who loves us, wants the best for us, and in order to spare us from something horrible we couldn't possibly have foreseen with our limited sight. From that moment on I began thanking God for the red lights in my own life. I started praising Him in the storms. And, I took a moment to look for the little sliver of positivity in every heartbreak.

Thank God for red lights.


Please visit my website
www.AshleyGesslerSHD.com

Wednesday, February 26, 2014

Just Beyond the Frame


In December of 2013, I began volunteering at the local animal shelter by taking pictures of the adoptable dogs.  Due to changes in our childcare, I was forced to drag Skyler to the shelter with me on picture day every week instead of going at it alone.  Well, it was actually a little less "dragging" and a little more "holding back," but nevertheless, the two of us wandered through the kennels together choosing small dogs that needed to be photographed and were gentle enough to interact with my four-year-old.

Skyler absolutely loves animals and has no concept of what a dog might be capable of if they are scared or uncomfortable in a situation, so we had the "No hands in cages...EVER," conversation before we went for the first time.  Still, saying that it was overwhelming at first would be an understatement.  It was incredibly challenging to collect a single dog from a kennel without releasing the other dogs, while Skyler squealed with delight and jumped around, while the barks of 20+ dogs are bouncing off the center block walls making it impossible to think let alone shout directions, while the just-released dog is darting back and forth on the end of the leash terrified and unsure of which direction to run, while thoughts are racing through my head about Skyler's safety and every possible danger that could be lurking just around the corner in an instance... that pretty much sets the scene.

Something was missing in my pictures.  The dogs weren't connecting with me.
 
The first couple weeks were daunting and exhausting until Skyler and I found our routine.  Without needing to shout directions now, I find the dog we need to photograph, she stands a few feet off within sight but out of the way, and then we take the dog into the outdoor play area for pictures.

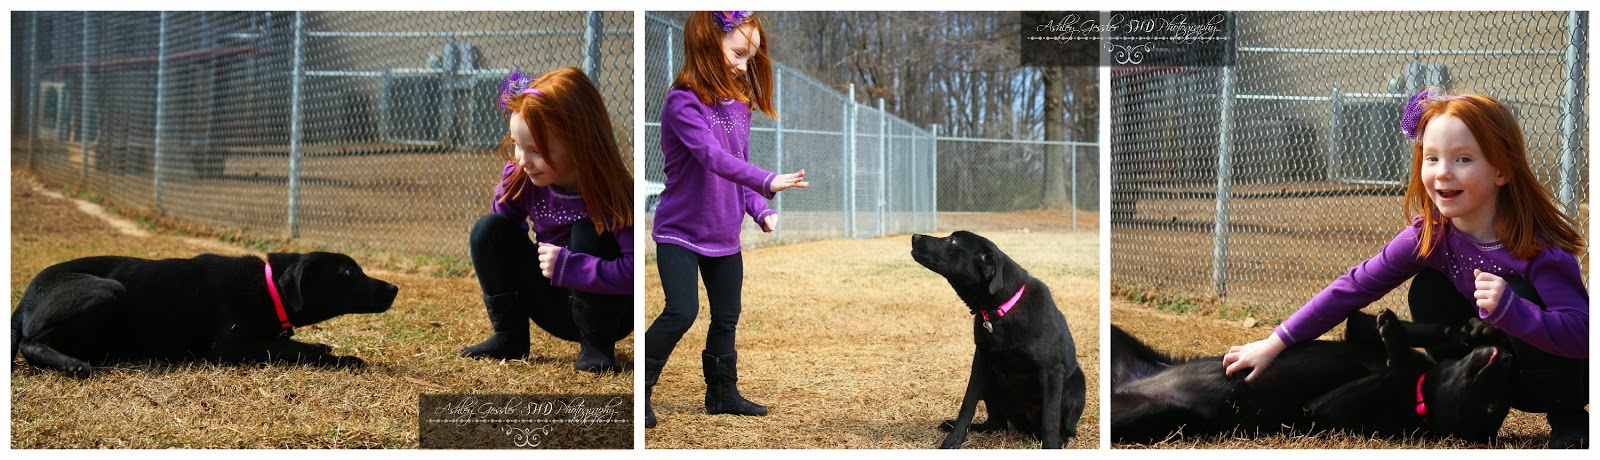
Around the second or third session, being quite pleased with the pictures I had been capturing, I began noticing a common thread and a difference between the faces of the dogs I had shot alone versus the faces  of the dogs I was shooting now.  I had been zooming in tight around the dogs, so I decided to open up the pictures a bit and capture some of the "action" going on just out of view, and what I began seeing touched my heart.

The first photo session that I shot on my own never quite had the "feel" I had been desiring.  Chock it up to beginner troubles, but it felt like something was missing.  Though I love dogs, they were unsure of me and remained aloof.  I couldn't seem to connect with them whether it was due to my unfamiliar scent or my being distracted with the camera.

Once Skyler entered the equation, that all changed.

At first, I wanted her close by my side while the dog was running around the play area.  I wanted her tucked away so she wouldn't interfere with my shot and I wanted her out of harm's way.  After all, these dogs are mostly from troubled or unknown backgrounds, but they were all attracted to her.  I call it the Little Human Effect.

She began playing with the dogs.  They were much more willing to approach her than they were to me because I'm that crazy lady that keeps shoving the black clicking thing in their faces, and what I saw was like magic!

The dogs' faces were lighting up.  They were coming out of their shells.  They were much more willing to shake off their uncertainties for my happy-go-lucky child.  Looking back, I wish I had tried less to zoom in on just the dog and tried more to capture the entire scene because that was where the magic was happening.

Skyler has an honest connection to these dogs and seems to bring out the best in each one.  This week, we had a shy little baby who ran from me every time the shutter on my camera clicked, however, she would follow Skyler's directions like they had been training together for weeks.  She connected with Skyler instantly, and I believe the pictures speak for themselves.
If I had been focused solely on what I was there to photograph I would have been missing these precious moments.  Last night, as I flipped through the pictures with Skyler's hand on the dog, or her boot foot in the frame, I would have ordinarily tossed them out since they couldn't be used for the shelter's purposes.  But, this time I saved them, and I'm so glad I did.

I see a kind heart and a genuine spirit that animals respond to.  I see a love that needs to be nurtured.  I see a quality that should be cherished and could one day develop into a talent that changes the world.

As a parent, I should be less focused on "What I'm there to do," and use the situation as a teaching moment that not only develops my daughter's heart, but also makes for some really great pictures that I would have otherwise missed.

Sometimes, I become so focused on what I want to see through the view finder that I'm shoving Skyler into the background and getting irritated without thinking about how it affects her.  It was, and still is, a common mistake on my part, and one that I deeply regret.
Sometimes the pictures are slightly unflattering (aka closed eyes, booty shots, princess boots in the frame of an otherwise perfect photo) but from now on I will be saving every shot I have with her in it even if the picture can't be used for the animal shelter's site.

BECAUSE THAT'S WHERE THE MAGIC HAPPENS.

This is where Skyler's learning about the love of animals, she's learning how to adapt herself to the needs of that particular dog, she's learning how to be kind, she's loving life, and she's being a kid, which is all too often devalued these days.  No longer will I crop her out of every frame.  I'm going to be a more patient parent, and I'm going to document these small and otherwise unnoticed achievements.

I have no way of knowing which moment might mold the rest of her life.

Please visit my website
www.AshleyGesslerSHD.com

Tuesday, December 25, 2012

Making printed candles

When I was looking for a way to make custom candles, I typed "candles custom" into YouTube and found this super neat technique!

 This photo was taken while the candles were still warm.

I've been making these for well over a year now and have finally somewhat perfected my technique.

So here's what you do:

Start with white or cream colored candles.  (I like the kinds with a really soft wax... the kind you can scratch easily.  The wax melts much more evenly, so spend a little more and buy the $12 candle instead of the $6 or cheaper brands.  I generally wait and buy mine at Hobby Lobby when they're half-off.)

You'll also need:
Plain white tissue paper
Scotch tape
Computer paper
Wax paper

Lay the candle down on a piece of computer paper and mark the candle's size.  Decide how long and wide you want the image to be.

Insert your chosen image into your word processor.  Adjust the Page Layout to match your paper (either Landscape or Profile).  Hold your computer paper with the candle size marking against the screen and adjust the Zoom until the page on the screen is the same width as the computer paper.

Okay.  Once that is done... resize your image until it fills your candle's size markings.


 With a new sheet of computer paper, you want to cut your tissue paper to a slightly larger size.  Check your tissue paper.  There is a lightly shiny side as well as a dull side.  You want the shiny side to be against your computer paper so your image will be printed on the dull side.  Fold over the edges and scotch tape the tissue paper onto the back of the computer paper.

Insert your paper tissue-side down into your printer (depending on your personal printer).

This is a good tutorial I found on YouTube.


Print your image onto the tissue paper.  I always allow mine to dry for a minute or two before messing with them.  Consider me paranoid.

Cut out your image while it's still attached to the computer paper.  It makes the tissue paper less-likely to tear.  Test it on your candle.  Trim and make adjustments as necessary, then the fun begins!

I use a regular old hair dryer with a concentrator nozzle for all of my candles.  Use HIGH heat and HIGH speed.

Lay your tissue and wax paper aside.  You won't need them for a few minutes.  Begin blowing your candle to warm the wax.  Continue warming until a slight moisture is barely visible on the surface of the wax.  This is not warm enough for the wax to bead or run, just lightly warm to the touch.  I can tell by how "oily" the candle feels to my fingers, but you'll be able to judge better with the more you do.

When the candle is sufficiently warm, add your trimmed tissue paper taking care to smooth out wrinkles and gently pull it taut around the candle.  Wrap your wax paper around the candle and begin blowing with your hair dryer.

As you heat the wax, the wax will melt and saturate the tissue paper and seemingly leave the printed image on the surface.  Be extremely leery of bubbles or wrinkles in your tissue paper as you work.  When the wax cools, wrinkles have always appeared on the surface of my candles.  With practice, I have been able to minimize their appearance, but unable to eliminate them completely.  Please, if anyone knows some trick to preventing them, please share your knowledge!

I like to start in the middle and work either to the right or the left.

This tutorial is the one I watched to develop my own technique.


If your image is designed to wrap the entire way around the candle, make sure one end is completely saturated with wax before working on the other side.

Once your tissue is completely saturated with wax, allow the candle to cool for several hours and then you're done!

It's during the cooling process that my tissue paper inevitably wrinkles.  If you know or figure out how to prevent this, PLEASE SHARE YOUR SECRET WITH ME!

This photo was taken once the candles were cool.  See the light wrinkling on the Juicy Couture one?

Please visit my website
www.AshleyGesslerSHD.com


Friday, December 21, 2012

A collar of my own making... for the pooch

We have a new dog. She's a 4yr old Miniature Schnauzer, and she is an absolute princess! Taking that into consideration, she deserves a collar to match her award winning personality. I typed in "rhinestone pink dog collar" into Google to see what it would come up with... this is what I stumbled across.
And I thought to myself... I can do that.

 So I went shopping: choke chain for $1 and 18 feet worth of pink ribbon for $2 from Walmart, a package of split rings for $2, a poodle charm for $3, and three large lobster clasps for $1.50 from Hobby Lobby.

I have less than $10 in this project and TONS of left-over materials for additional creations!

So we begin.

I measured the clasp and chain parts (including one of the large rings) alongside Phoebe's current collar.  I marked one link longer than I figured I would need (now, I am extremely grateful I did).  I had my husband cut the chain.

Now, with my newly-trimmed chain, I attached the clasp to one of the split rings and attached it to the end of the chain.

Next, I began weaving the ribbon through the chain.  Once I had woven through the entire length, I tied off the ribbon and melted the knot with a lighter.  Repeat on the other end.

Attach your chosen charm.

Easy as that!

 
Phoebe is getting a new collar from Santa for Christmas!

Please visit my website
www.AshleyGesslerSHD.com


Thursday, October 25, 2012

Building Me A Bench

I've been talking about it for forever...

A BENCH.

A bench that looks like a window seat..

A bench that looks like a window seat but also has a lift-lid for hidden storage.

A bench that looks like a window seat with a lift-lid that can also be used as seating at the dining room table.

A bench that looks like a window seat with a lift-lid that can be used at the dining room table... like the one I saw in Better Homes and Gardens and fell in LOVE with!

 
A bench like this!


Jason and I have been tossing ideas and sizes and design structures around for over a month now.  We finally settled on what we wanted and Jason started construction today!

 
Our lovely blank wall.


My bench is born!

The frame is 5 feet long, 20 inches deep, and 20 inches high.

 See all the messy toys?  That's what we're trying to hide.

 
The scariest moment was when Jason cut and pulled off the baseboard.
That's when things got really real.

I pulled pictures from when we were constructing out house to find out where the studs were so Jason knew where to place the nails.  (The pictures we took during construction have proven to be PRICELESS over the years!  If you build, be sure to take pictures of absolutely everything.  You'll thank me later!)

We used decorative corner trim pieces.

Once the frame was attached to the floor (using concrete anchors drilled directly into our concrete slab) and the wall (using 3.5" screws), Jason cut and attached bead board to the outside of the frame.  He then trimmed and nailed a baseboard.  We decided to use decorative trim pieces for the corners which turned out quite lovely.

We used wood filler for any holes, sanded, and we were ready to paint!

The last piece was the solid wood top.  Since we couldn't get our hands on a single piece of wood in the size we needed, Jason used two 1x12x6 pieces of wood, fused them in the middle, and routed the edges.  With a little sanding, it is now looking like it has been attached to our wall the entire time we have lived here!

Hinges will come later, but for now, it's still functional for sitting and it's hiding a great deal of clutter.

 Stain coming soon!

Please visit my website
www.AshleyGesslerSHD.com


Thursday, September 6, 2012

Making a "canvas" print

I saw a company on Pinterest that would take a photo of your choice, place a poem on it, and print it on canvas for you.  It was pretty expensive to have it done, but I liked the idea...

... SO WHY NOT MAKE IT MYSELF?


Blurry picture- love but not useful

I have always loved this picture from our wedding day, but with it being blurry I never had a use for it until this project crossed my path.

I started with this raw picture.  In my photo editing program I trimmed it to 11 X 14 and added text to the image.  I decided to use our wedding vows instead of a poem because they have so much more meaning to us, and keep in mind that any picture will print slightly larger than the desired size so don't run your text up to the edge of the picture!  I sent the picture to be printed at Southerland's Photo so it would be the very best quality.  Plus, I would much rather give my business to a small business where the people actually care about the product they produce than some un-feeling chain company any day.

I purchased an 11 X 14 canvas and Mod Podge at Hobby Lobby.  I already had black acrylic paint, sponge brushes, and acrylic sealer from previous projects.
Finished project!  The blurry picture in the background really adds
to the beauty
Here's how I put it together:
(Super easy!)

1. Paint the edges and back of the canvas with black acrylic paint.  Canvas is porous so it took several coats.
2. Trim the picture to just inside the edges of the canvas so nothing hangs over.  My canvas was not perfectly square, so keep that in mind when you're trimming.

3. Use a black Sharpie to disguise the white edges of the printed photo.

4. Mod Podge the canvas face and apply your picture.  I flipped the canvas face-down and rubbed the back while the Mod Podge was drying so I got a nice flat picture without air bubbles.

5. Mod Podge the sides and front of the canvas.  Make sure to get the Mod Podge deep into the crevices along the edge of the print so nothing can catch on it and rip it off.  I did 3 coats (waiting about an hour between coats).

6. Spray with an acrylic sealer so it won't have that "tacky" feeling.
The white edge of the picture before disguising it with the Sharpie

Please visit my website
www.AshleyGesslerSHD.com


Thursday, August 16, 2012

I can't believe it's NOT stained glass! {Part 5}

A painting we will go!

Wipe off any exposed guidelines (from the carbon paper of grease pencil) off the glass!

I like to start with a background color that will make me feel like I've accomplished something.  In this case, I started with the Cocoa Brown because nothing excites me more than seeing the morning sun shining through the first bits of "painted glass" even if that bit is nothing more than one 2" X 2" square.

For the SEMI SOLID areas like the 1 inch border around the entire window, I start at the top of my chosen section.  I sling the bottle one good time to ensure that all the paint is completely into the tip of the paint bottle.  AIR BUBBLES ARE NOT YOUR FRIEND and a pain to deal with, so I try to keep them from happening in the first place.  I squeeze out enough paint that it slightly oozes down the glass.

  Gently squeezing the bottle, I scrub the paint in small, smooth circles, making sure any air bubbles in the paint are immediately pressed out and popped as soon as they happen.  I move down that entire section.  When I'm nearing the bottom of the section, I stop squeezing the bottle and use what paint is already on the glass to move against the bottom leading strip until all the crevices are filled in and the paint is all relatively the same thickness.

If you see a mistake in the earlier portion of your section LEAVE IT ALONE.  The paint begins setting quickly and will become tacky within minutes.  You can always come back with a razor blade and peel off a section once the paint dries if it's absolutely necessary.

Wipe any excess paint off the leading strip and be careful not to accidentally touch the wet sections.

The SOLID AREAS, like the solid white sections in the middle of the window, use up a great deal of paint.  I used almost 4 bottles of Snow White paint just for the four large, white boxes.  I start by slinging the bottle so everything is in the tip and all the air is safely at the top of the bottle (VERY IMPORTANT!) before running a very thick line of paint at the top of my section... thick enough that the paint flows down the glass.  Instead of scrubbing the paint as I do for the Semi-Solid areas, I continue squeezing the bottle and adding more paint as I move further and further down.  You always want to make sure your bottle is being held so the paint will continue to flow into the tip uninterrupted!  Since you're not scrubbing the paint onto the glass, there are precious few chances to eradicate any air bubbles without leaving mark.

Once I near the bottom, I only gently squeeze the bottle and scrub in small circles to move the paint up against the leading strip.  If the paint is too thick at the bottom of the section it will roll over the leading strip and spill into the next section.  Keep in mind that gravity is at work here!

The DISTORTION AREAS are by far my favorite to paint.  It's like scribbling in sloppy cursive!  There really are no special tricks or tips... just have fun.  If the paint gets too thick, it will look more like a Semi-Solid section instead of a Distortion area, but play with it and figure out which look you prefer!

AND HERE IS THE FINISHED PROJECT!!!

 
Please visit my website
www.AshleyGesslerSHD.com

Thursday, August 9, 2012

I can't believe it's NOT stained glass! {Part 4}

I drew out three different flower shapes that were all similar yet different at the same time and labeled them as such: Large, Small, and Wide.  These were the designs I traced directly onto the window to make my job a little easier.

Large, Small, and Wide flower stencils.

I leaded the strategically placed and traced flowers first.  Next, I leaded the leaves free-hand, connected the flowers with the lead vines, and created the "curlie-q's."  Leading free-handed is my favorite part because it's like drawing with very little room for error!

Every time I cut off extra leading strips, or reached the end of a strip and had a bit left over, I saved the pieces... even the tiny little shreds.  There were plenty of instances where I only needed a 1/4 inch piece and it would have been silly for me to start a whole new strip.

Save the left-over pieces of leading strips.

Lastly, I leaded the straight lines behind my flowers by following the lines I drew in {Part 2} with the carbon paper.  I used a ruler after the strip was placed to push it into a perfectly straight line (using my fingers made the lines look wavy).

I soldered all the joints with liquid leading which took me almost three days in and of itself because my hand kept cramping from squeezing the bottle.  And, "POOF!"  Here it is!  All leaded and ready to paint!

Completely leaded and ready to paint!

Please visit my website
www.AshleyGesslerSHD.com

Saturday, August 4, 2012

I can't believe it's NOT stained glass! {Part 3}

Now that the basic 1" frame is complete, I started filling in the gaps between the leading strips with liquid leading to "solder" the joints together.
I'm not worried about the gaps between the leading strips.  I'll fill them later with liquid leading.


 Same as the picture above but after the gaps have been filled in.


I try to be as neat as possible when I "solder," but the liquid leading tends to be a bit sticky so I generally have to come back with a razor blade once the leading is dry and scrape any excess off.

Now the fun stuff can begin!  I started adding the little details that really make the "stained glass" come to life like the wavy lines in the top two corners and the little detail lines between the 1" borders.  Once all these lines have been placed, soldered, and have had time to dry, I can begin leading the flowers.  While I'm waiting for things to dry, I'm going to try drawing my basic flower shape on paper to find out about how large I want them to be.

Looking good!

Please visit my website
www.AshleyGesslerSHD.com

Thursday, August 2, 2012

I can't believe it's NOT stained glass! {Part 2}

To start my project, I lined the window with masking tape so I could write notes.  This isn't my first stained glass project (First Things First) so I've learned a few things and am hoping this time things will go more smoothly even though the design is more complicated than the one I tackled last time.  I measured the panes of glass and wrote them on the printed picture of, "Option #5" from Part 1 of this blog.  I began marking my 1" border around the edges of the glass.  Next, I did some quick calculations, wrote them all down on my printed design, and got to work.
I think messy.

In my first window project, I didn't know that the upper and lower panes are slightly different sizes, so it really threw me for a loop when my guidelines were all screwed up!  Not the case this time around.  The upper pane (in this case it's the left one) is 27" wide by 31.5" high while the lower pane is 26.75" wide by 30.5" high.


Once all my marks had been made for the 1" frame and grid-like frame behind the flowers, I laid carbon paper on the window and, using a ruler with a square end, began tracing my guidelines onto the window itself.  I decided to draw only the straight lines for the clear and white grid-like frame behind the flowers and free-hand everything else (aka the flowers, vines, and leaves).

Using carbon paper to trace your guidelines is tedious and time consuming, but it gets the job done.

Making the decision on where to start with the leading process was difficult.  I struggled a long time with whether to begin with the flowers, or try and lead as much of the straight background lines as possible.  Eventually, I decided to lead the 1" frame first because they are all uninterrupted straight lines.  My plan is to lead the flowers second, leaves third, vines fourth, and the straight background lines last.  The carbon lines easily wash off the glass with Windex if I need to erase any of them so they don't show through.
Leading the 1" frame

Please visit my website
www.AshleyGesslerSHD.com


I can't believe it's NOT stained glass! {Part 1}

I am finally getting around to tackling a project I have had in mind for well over a year!
The upstairs hall window with a less-than desirable view.

Here's the hall window that looks onto the neighbor's wall and overlooks the back half of the neighborhood when you approach from the master bedroom.  Not very attractive.  I've been thinking that I could appreciate a bit more privacy.

I found this design (right picture) on the cover of a book I picked up at Hobby Lobby called, "Creations on Glass."  It's by the same woman who wrote "The Ultimate Guide To Glass Decorating," and while the techniques are exactly the same in both books, the cover pictures were different (which is why I now own both.)  Blue doesn't exactly match the house's color theme, so I scanned the picture and digitally changed the flowers to red (left picture).
                              (left) Digitally changed flowers to red. (right) Original picture.

Once the colors were right, I overlayed the design with the photo of my own window so I could have a better visualization.

It seemed a bit cluttered having the same pattern right next to each other, so I tweaked it a bit in my photo editing software.  I wound up with 6 different designs, but Option #5 was my favorite...
Option #5

SO HERE WE GO!!!

Please visit my website
www.AshleyGesslerSHD.com